
Creating a new customer and configuration in Builder
Click here for click-by-click instructions with screenshots of each step or read on for the key points...
For first time ALEX customers the first step is to create a customer profile. You can do this by going to the Customers tab and selecting Create a Customer or by clicking +Create a New Configuration and selecting New Customer.
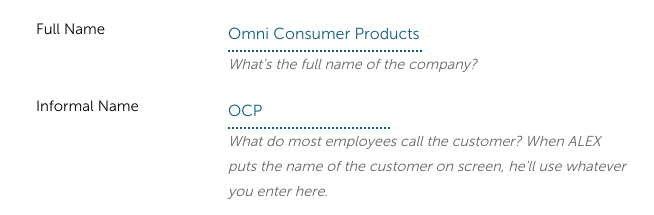
You will then be prompted to enter the customer's details:
The Full Name is only used in Jellyvision's backend systems, while the Informal Name appears in the ALEX conversation.
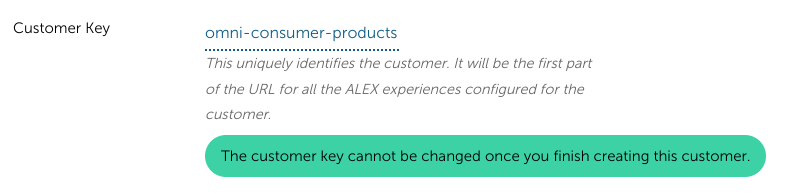
The Customer Key is only used in Jellyvision's backend systems. It is not displayed to users anywhere in the ALEX experience.
The Customer ALEX URL is the custom portion of the ALEX URL. Most groups use a variation of the customer name in this field so the final ALEX URL will be something like https://start.myalex.com/CUSTOMERNAME
Please note: This URL is not set in stone and can be changed, but usually requires some backend adjustments. If you want to make a change just reach out to selfservicesupport@jellyvision.com.
Customer Website is only used in Jellyvision's backend systems. It is not displayed to users in anywhere the ALEX experience.
Employer Identification Number is optional and only used in Jellyvision's backend systems. It is not displayed to users anywhere in the ALEX experience.
Click "Start configuring ALEX for this customer". This will complete the Customer profile and you'll move on to creating the configuration for a specific plan year.
Choose between Self-Service Essentials or Fundamentals.
Essentials includes Benefits Counselor (audio-led), ALEX Go (English and Spanish), Benefits and New Hire Sneak Peek videos and Medicare.
Fundamentals is only ALEX Go (English and Spanish). This is the text-based version of ALEX.
Choose the products you'd like to include (this can be changed at any time from the configuration) and the plan year the configuration will be for.
Click "Finish and start configuring plan details" and your new configuration will open. You can then start filling in plan data!